D2L Brightspace Integration Guide for Admins
Key Points
- Approximate setup time is 10 minutes.
- Once Admin integrates Rumi in Brightspace, all Instructors will have access to Rumi.
- To use Rumi in Brightspace, classes and assignments must be created in Brightspace, not Rumi.
- This is a single-sign on integration, you should not register new accounts on Rumi.
- Important: For steps 3 and 9 you may need to replace app.rumiessay.com with one of the following subdomains. Please contact support@rumidocs.com in advance to confirm which subdomains you should use. The available subdomains are:
- Schools in the east coast
- us-east-1.rumidocs.com
- us-east-2.rumidocs.com
- us-east-1.rumidocs.com
- Schools in the west coast
- us-west-2.rumidocs.com
- app.rumiessay.com
- Schools in the east coast
Integration Steps
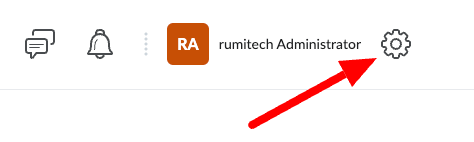
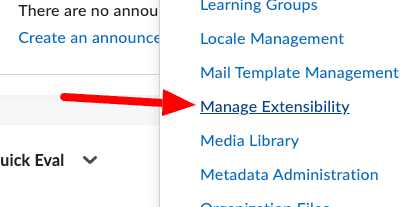
Step 1. Open Manage Extensibility
Click on Settings (Top right Cogwheel) → Choose “Manage Extensibility”.
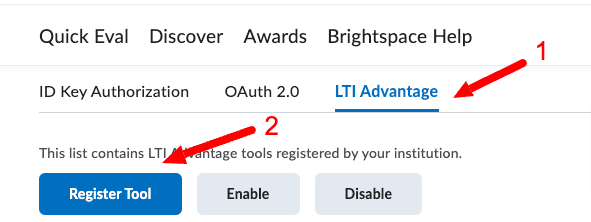
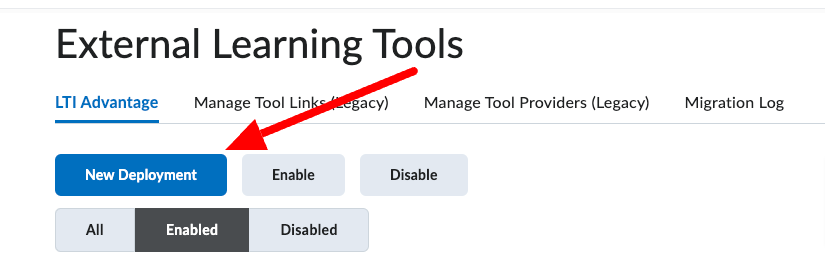
Step 2. Register LTI Advantage
Select “LTI Advantage” Tab → Click “Register Tool”.
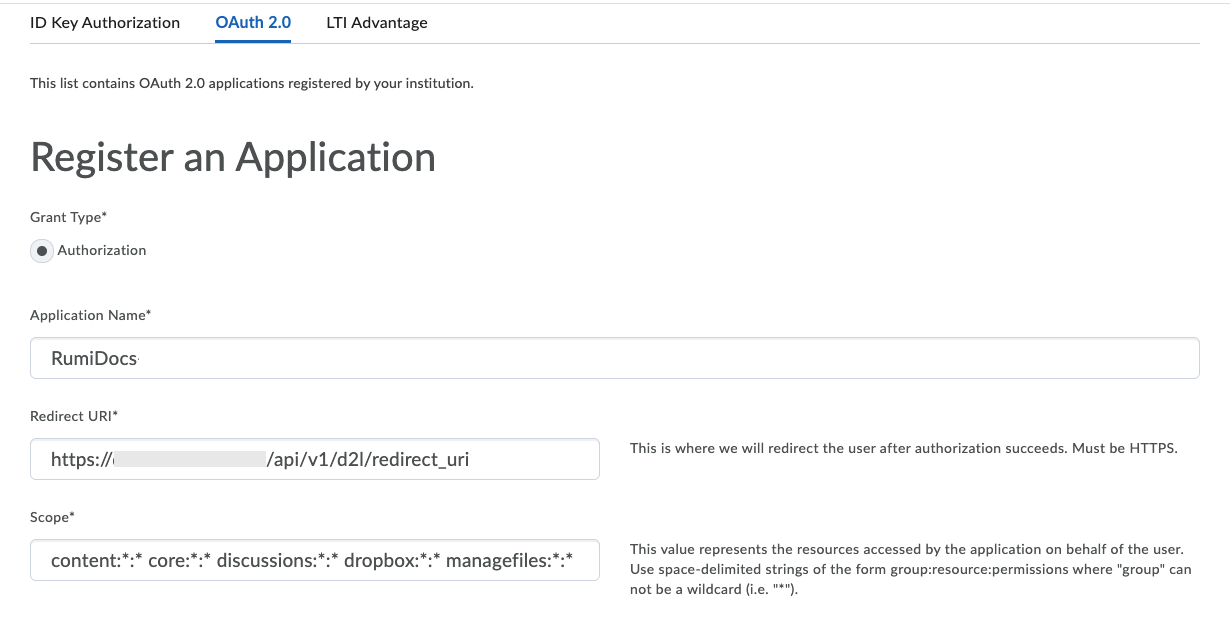
Step 3. Enter Tool Details
Select "Standard" and enter the following information in the form:
Step 4. Share Platform Info
Email the following information to support@rumidocs.com
- Client Id
- Brightspace Keyset URL
- Brightspace OAuth2 Access Token URL
- OpenID Connect Authentication Endpoint
- Brightspace OAuth2 Audience
- Issuer
Once data is shared with Rumi click on “View Deployments”.

Step 5. Create Deployment
Click on “New Deployment”.
Step 6. Configure Deployment Details
Fill out the form with the following information
- Enabled: On
- Tool: Rumi Docs
- Name: Rumi Docs Deployment
- Description: Implement Class AI Policy with Confidence
- Under Extensions: Select
- Assignment and Grade Services
- Under Security Settings check
- Org Unit Information
- User Information
- Link Information
- Under Configuration Settings check
- Grades created by LTI will be included in Final Grade
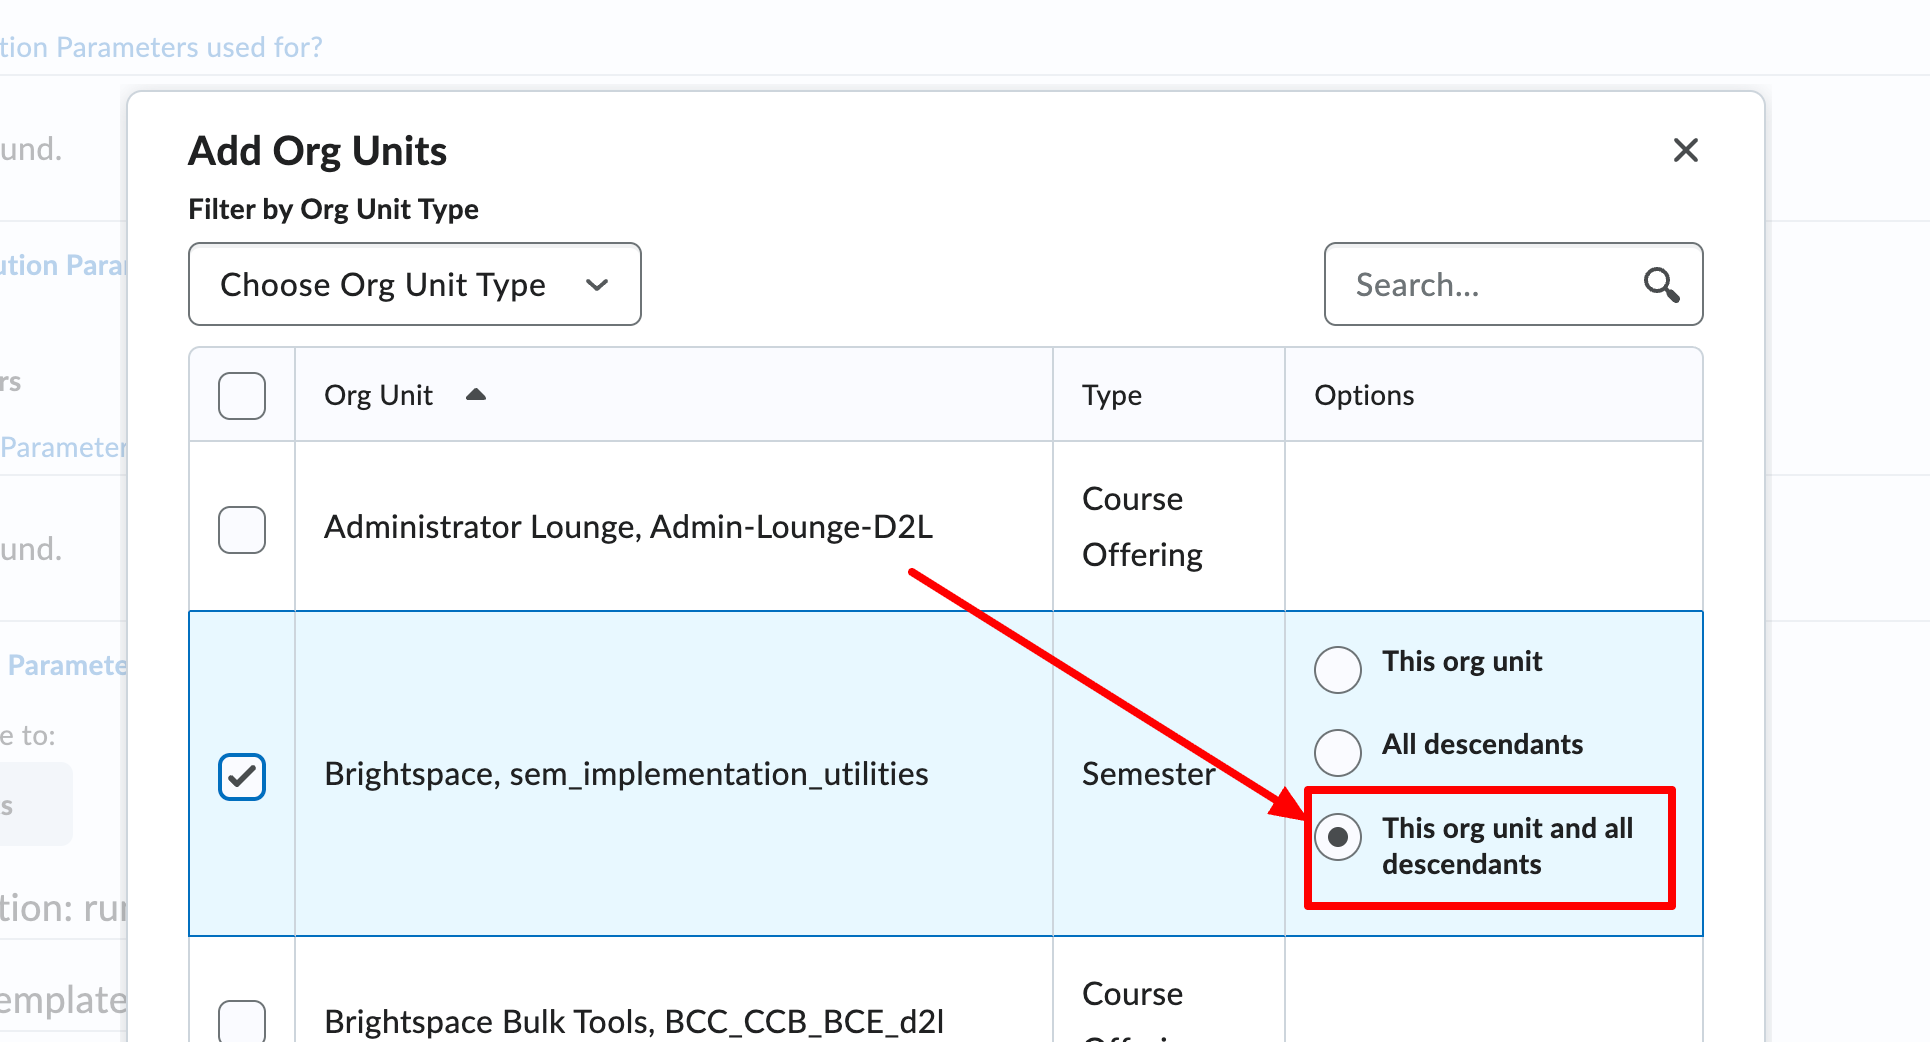
- Select the Organizations you want to have access to Rumi
Note: To ensure this organization and all its sub-orgs or courses have access to Rumi, select 'This org unit and all descendants' as shown in the image below:
Click on “Create Deployment” when done.
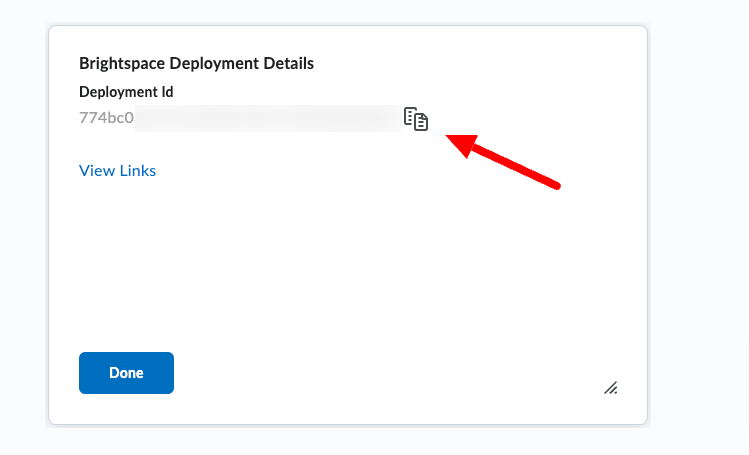
Step 7. Share Deployment ID
Share the “Deployment Id” with Rumi (support@rumidocs.com) then click on “Done”.
Step 8. Add New Link
Click on View Links then click on “New Link”.

Step 9. Configure Link Details
Add the following information:
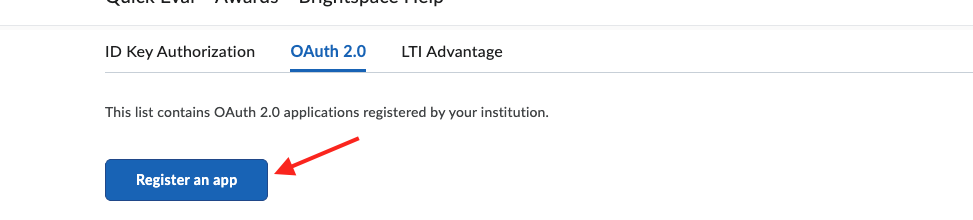
Step 10. Configure OAuth 2.0
- Navigate to Manage Extensibility → OAuth 2.0.

- Click Register an app
- Enter the following details:
- Click Save. You will be issued a Client ID and Client Secret.
- Share the Client ID and Client Secret with Rumi Support (support@rumidocs.com)

Now follow the Guide for Instructor to add Rumi to an course.
Note: New Content Experience
Make sure you have enabled the “New Content (Lessons) Experience” in Brightspace. Below is a video that shows how to enable "New Content Experience" for a course.
Note: Revoking OAuth 2.0 Access
Users can remove OAuth authorization at any time.
Warning: Revoking authorization will prevent Rumi and CourseLM from functioning correctly.
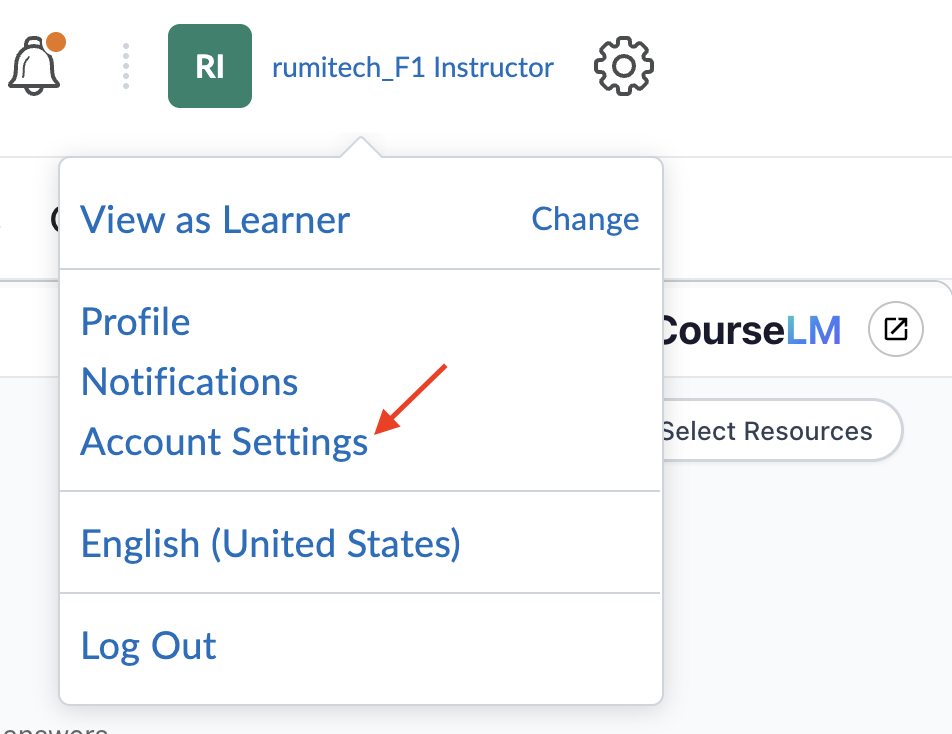
- Go to Account Settings → Manage Applications
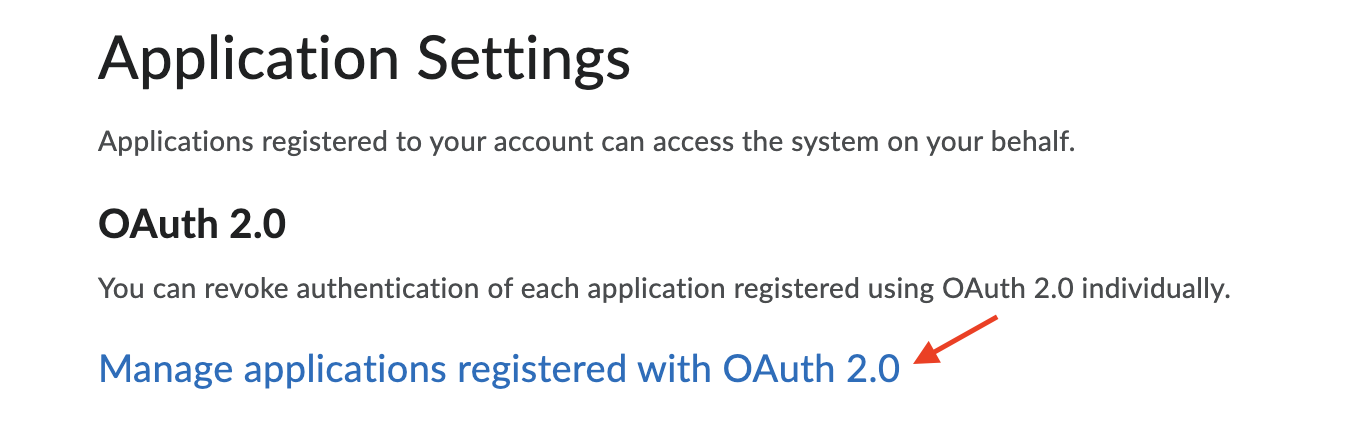
- Locate the Application Settings section and click Manage applications registered with OAuth 2.0.
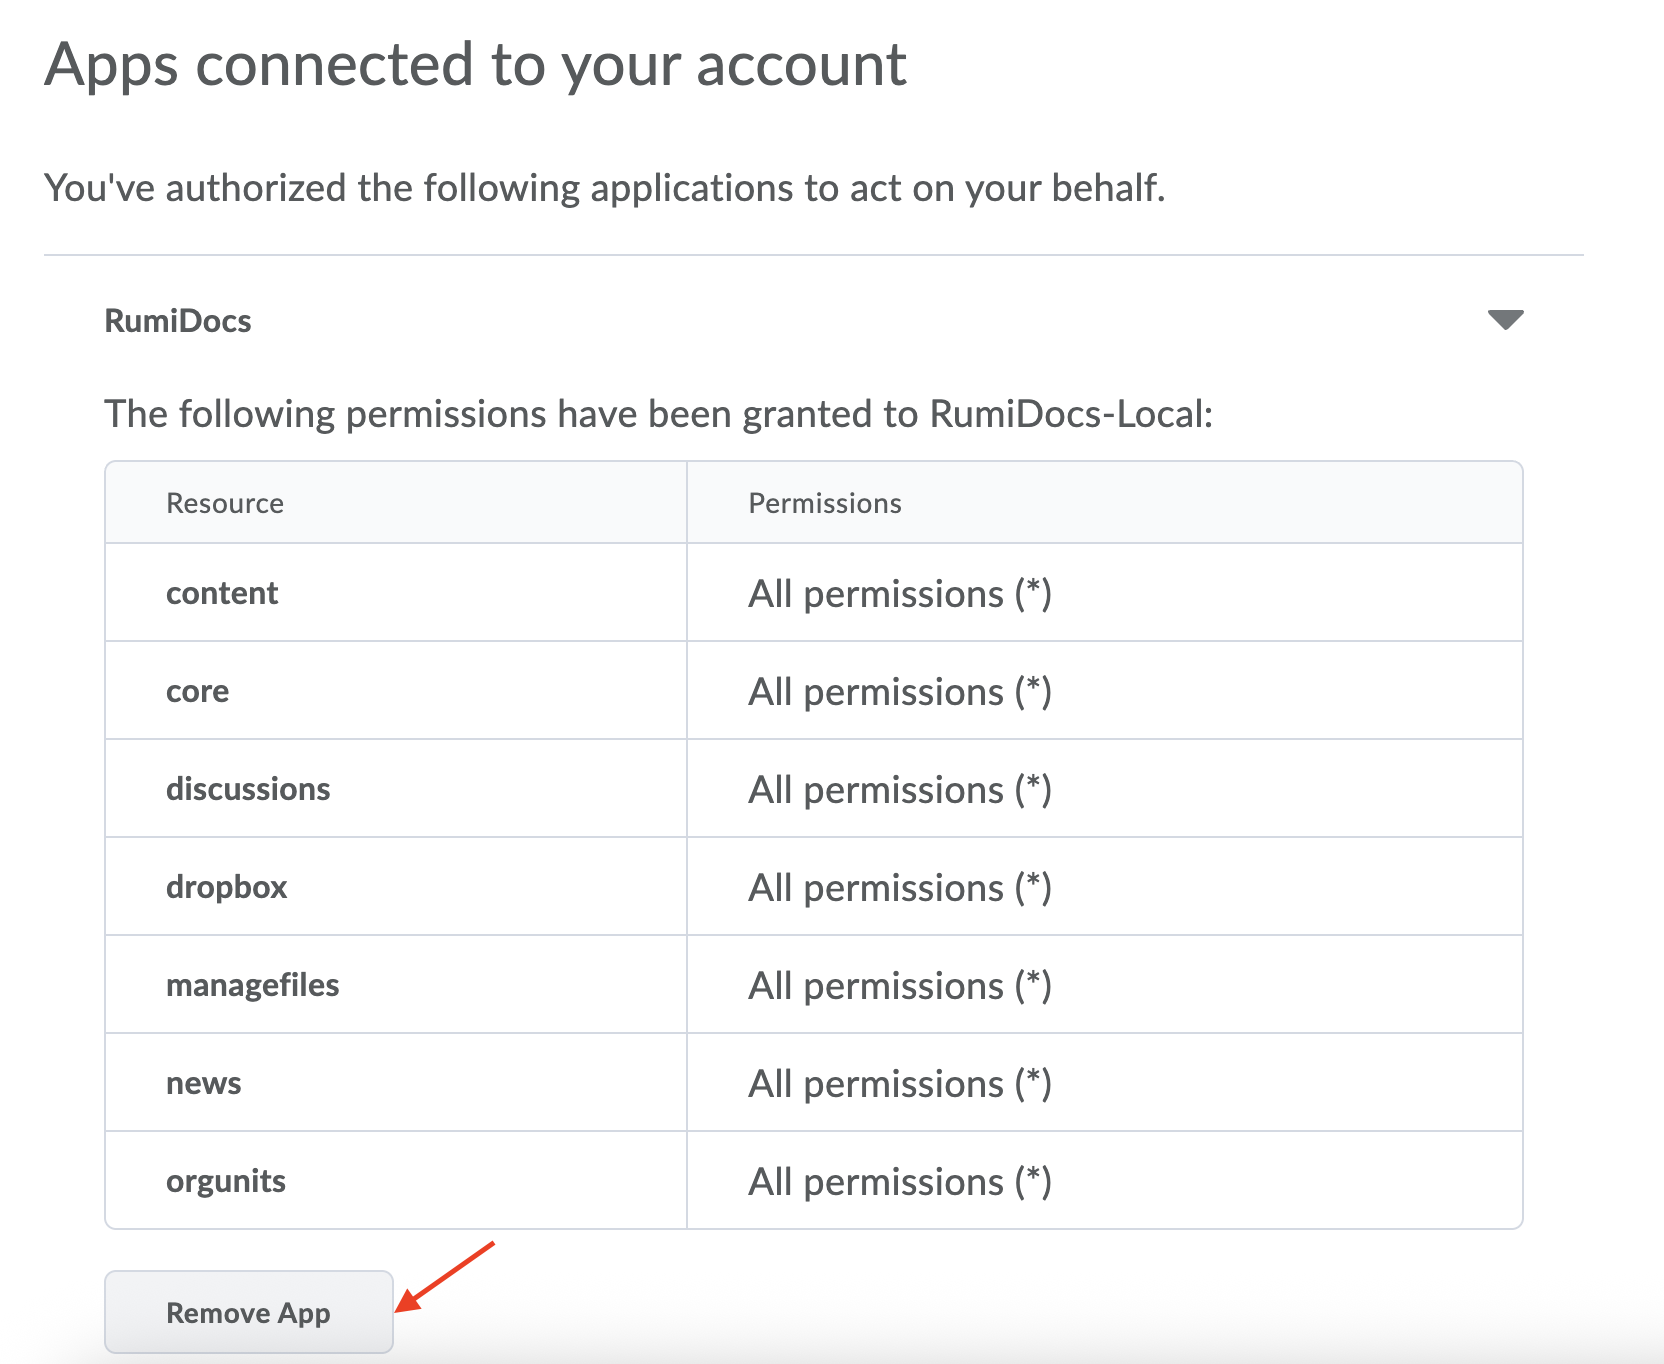
- Find the application (e.g., RumiDocs).
- Expand the application details and click Remove App.
CourseLM Setup
Step 1. Required Permissions
If CourseLM is enabled but you cannot see "Navigation & Themes" under the Settings (gear icon), you must enable the following permissions:
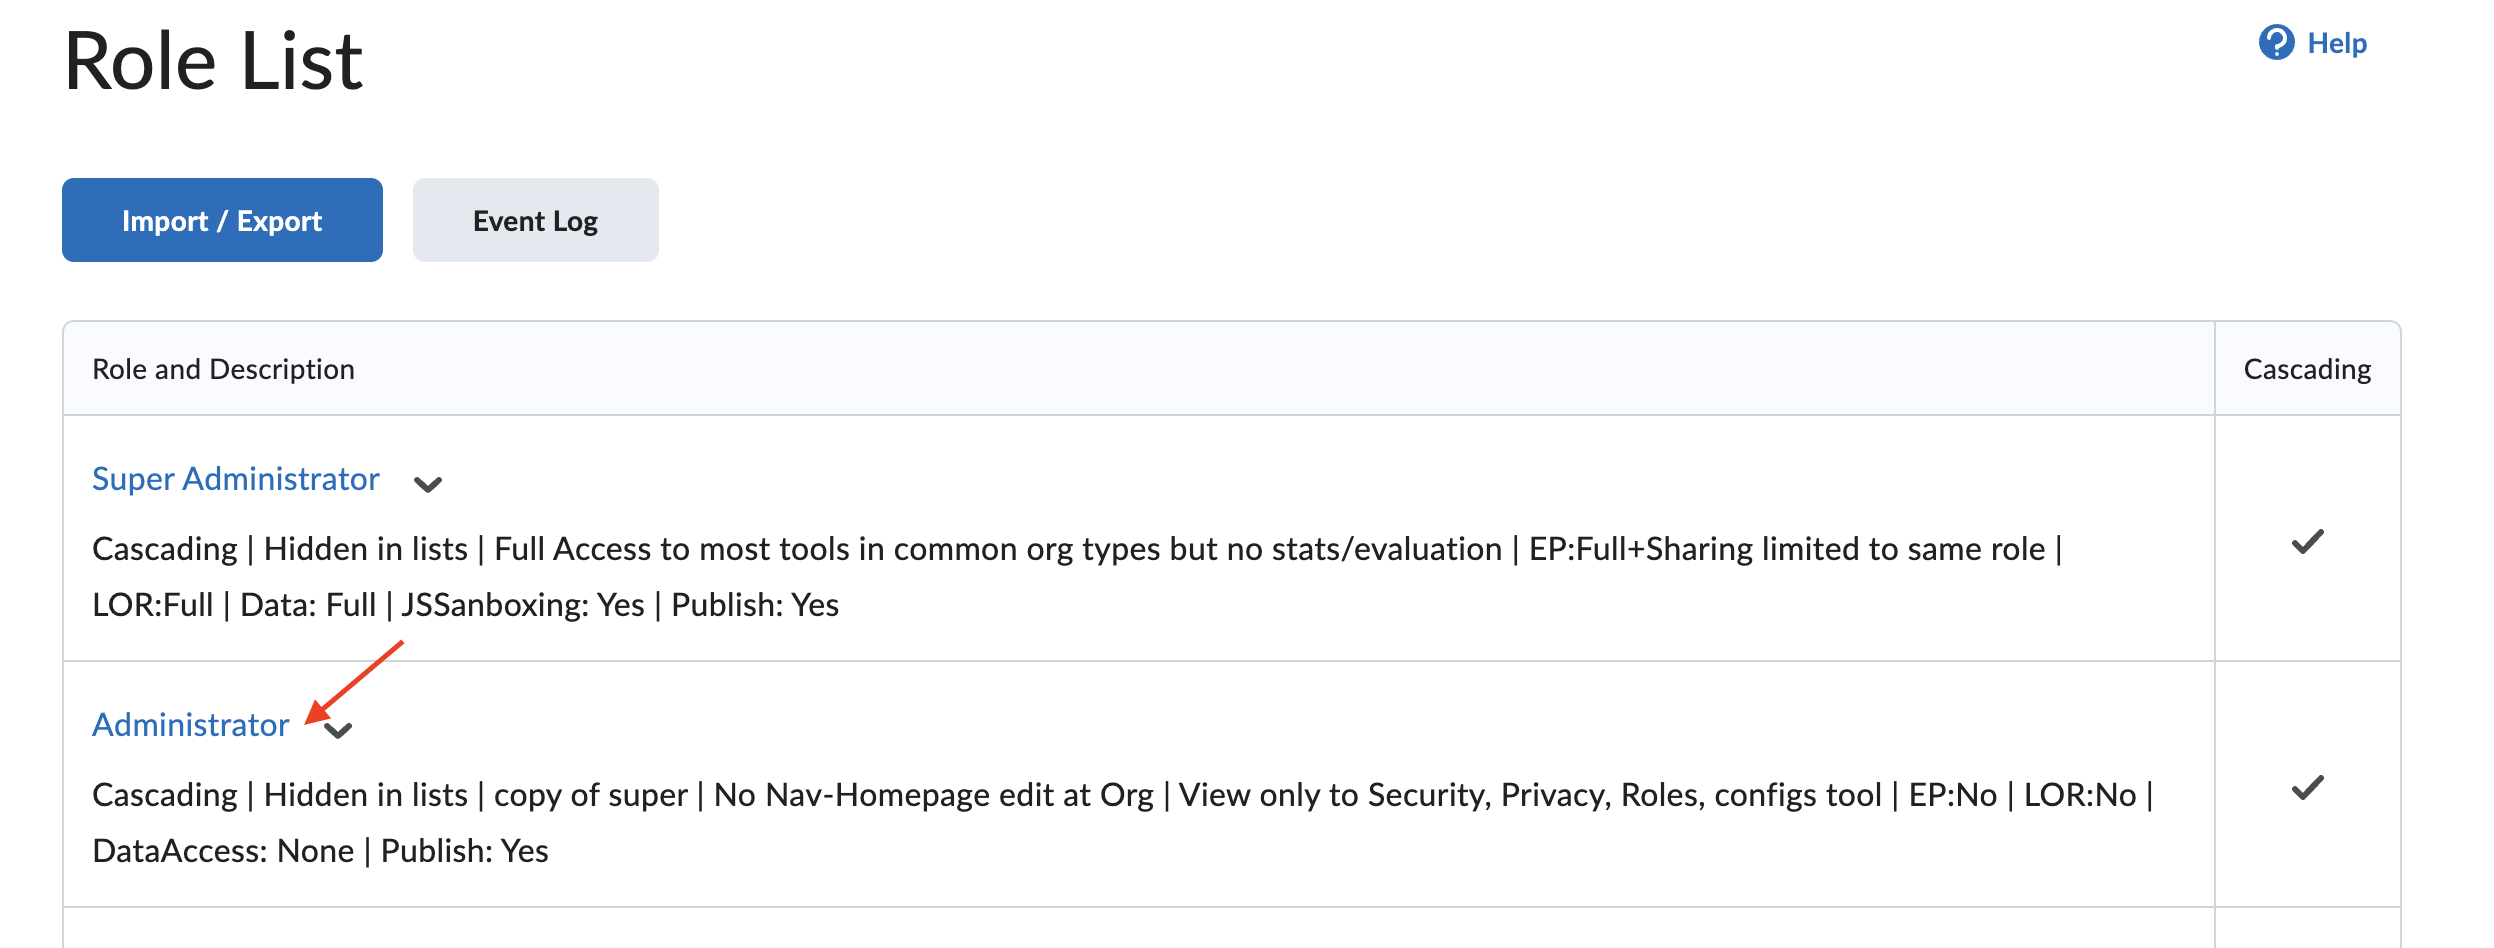
- Go to Admin → Roles and Permissions
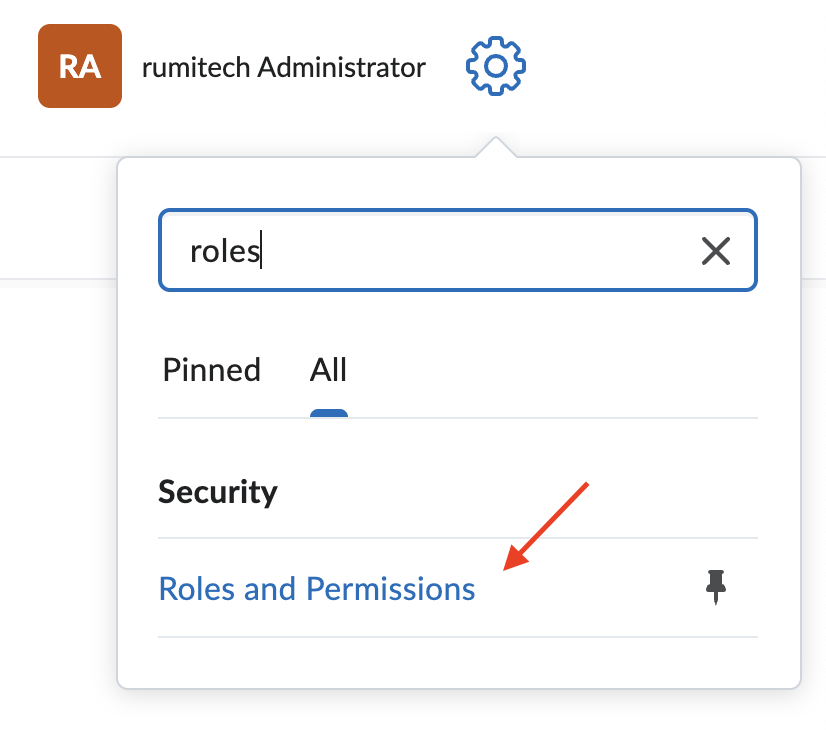
- Select your role (e.g., Administrator)
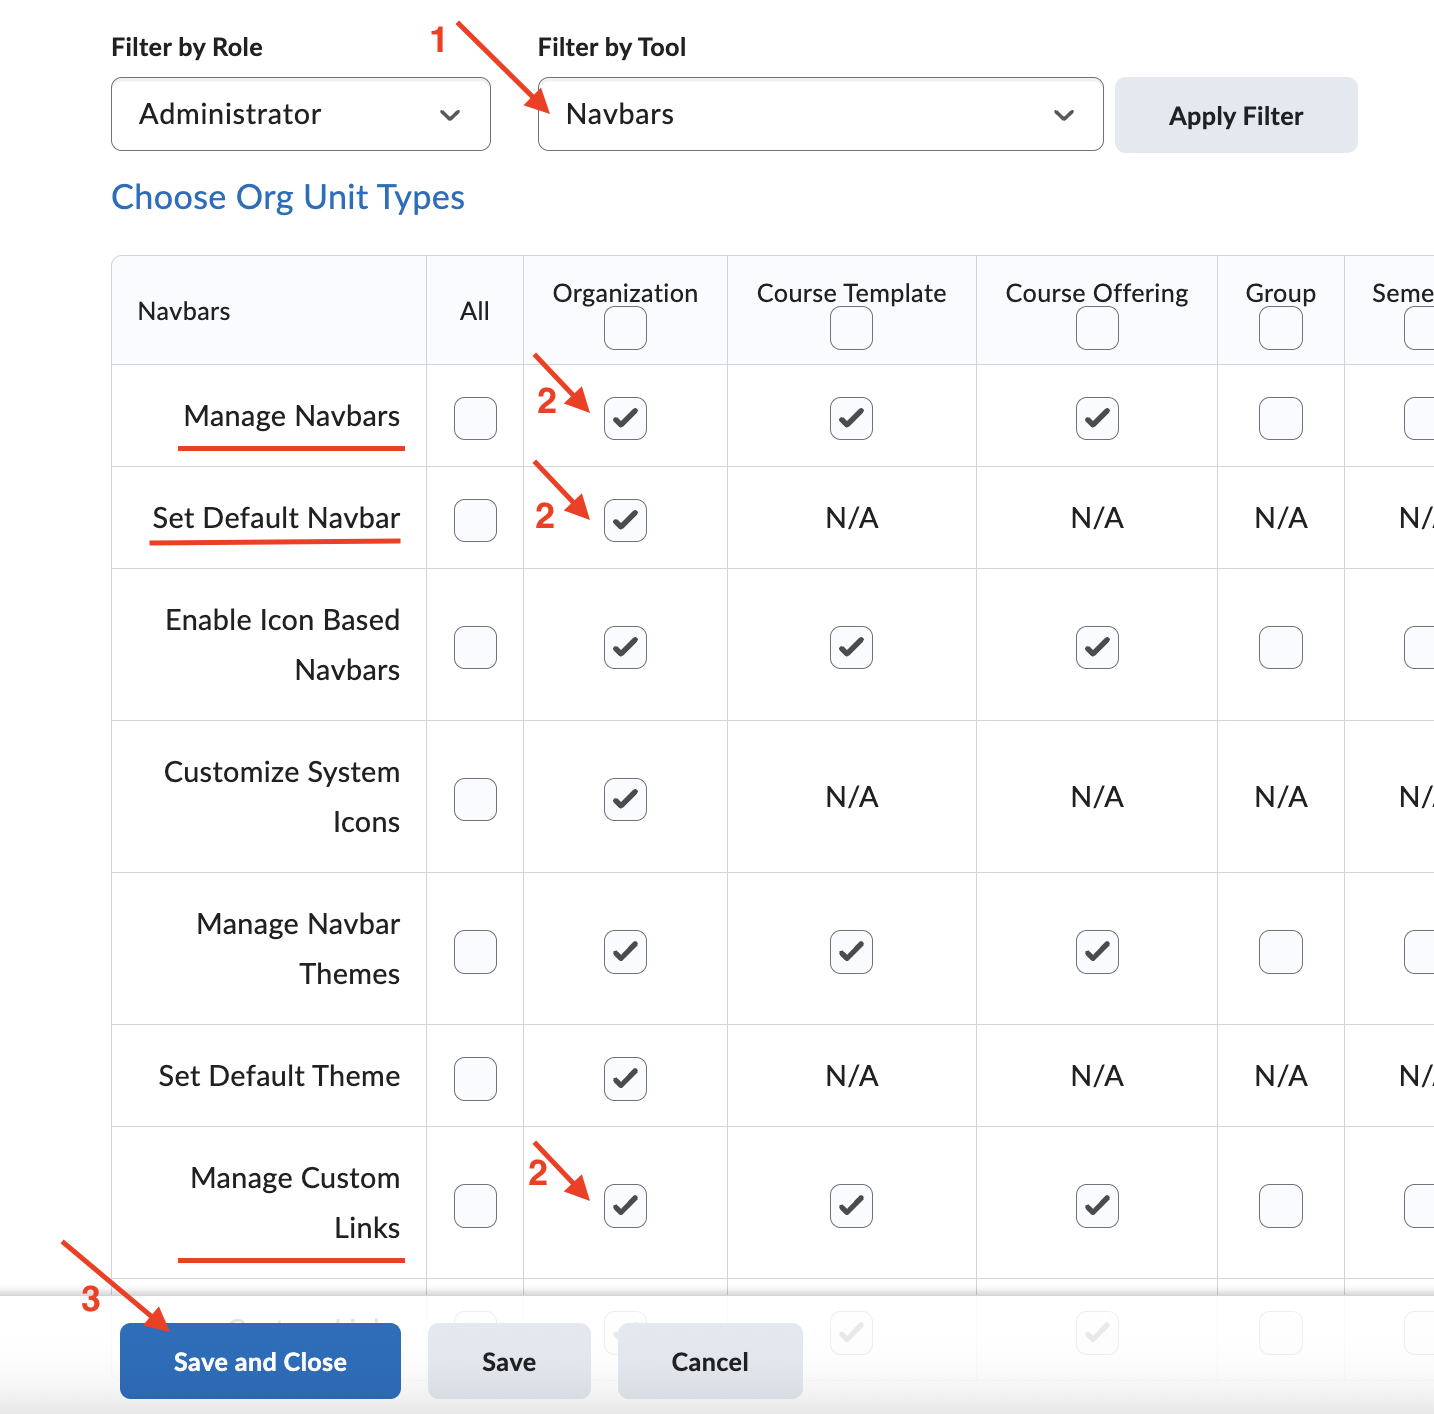
- Filter by Tool → Navbars
- Enable the following permissions at the Organization level:
- Manage Navbars
- Set Default Navbar
- Manage Custom Links
- Click Save and Close.
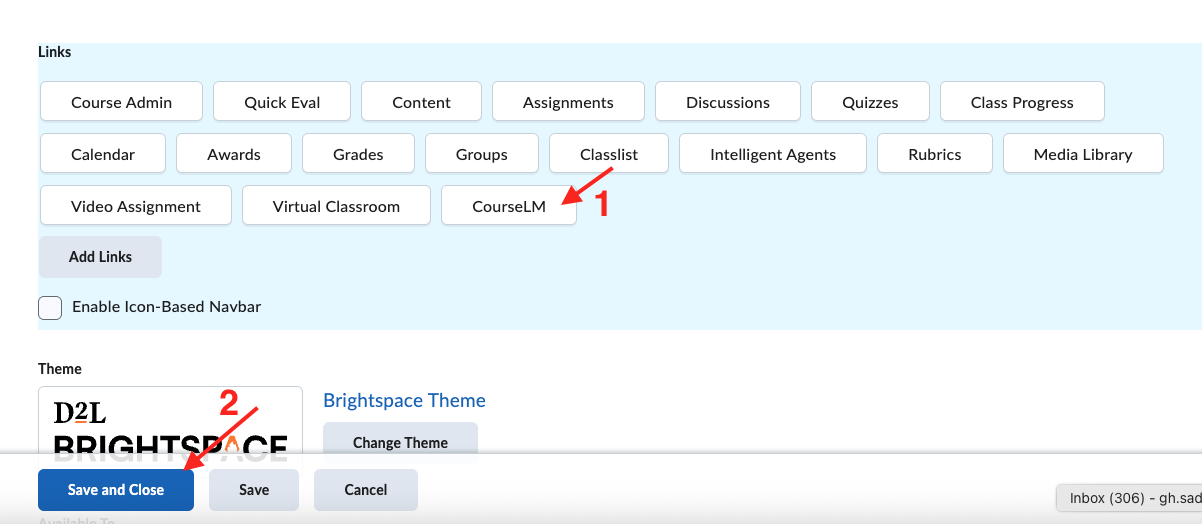
Step 2. Add CourseLM to Navbar
- Go to Admin → Navigation & Themes
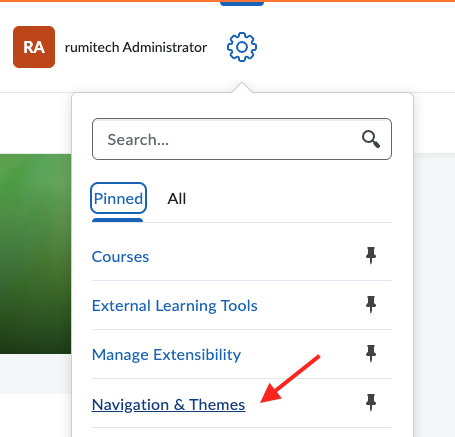
- Click on your Course Navigation System

- Click Add Links, then select Create Custom Link
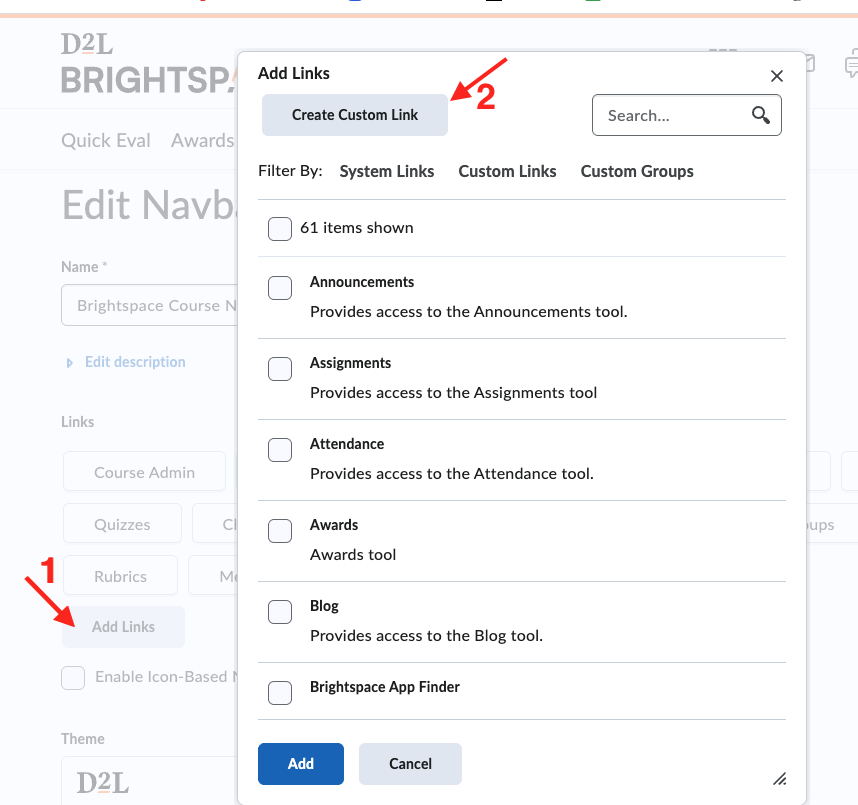
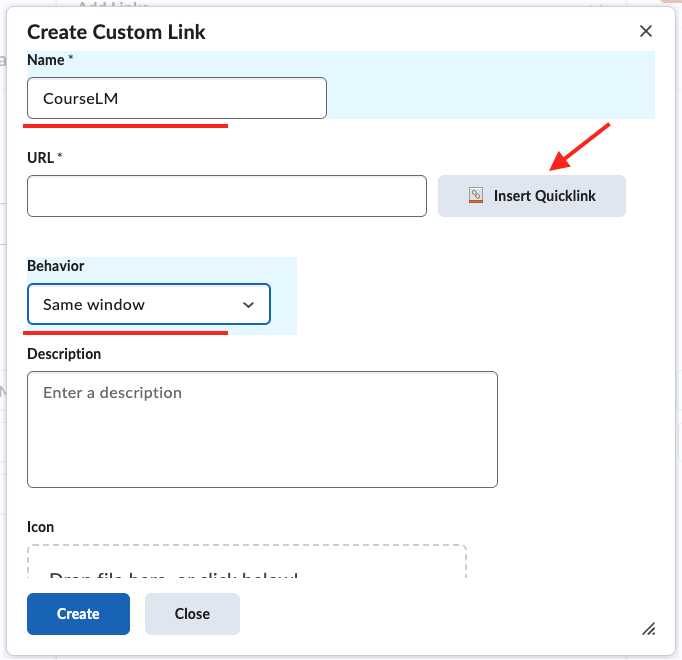
- Fill in the following:
- Name: CourseLM
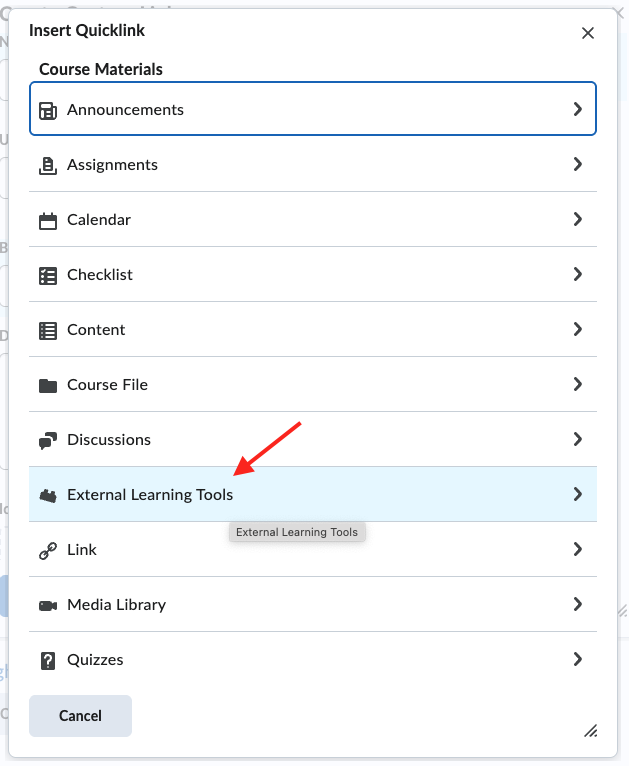
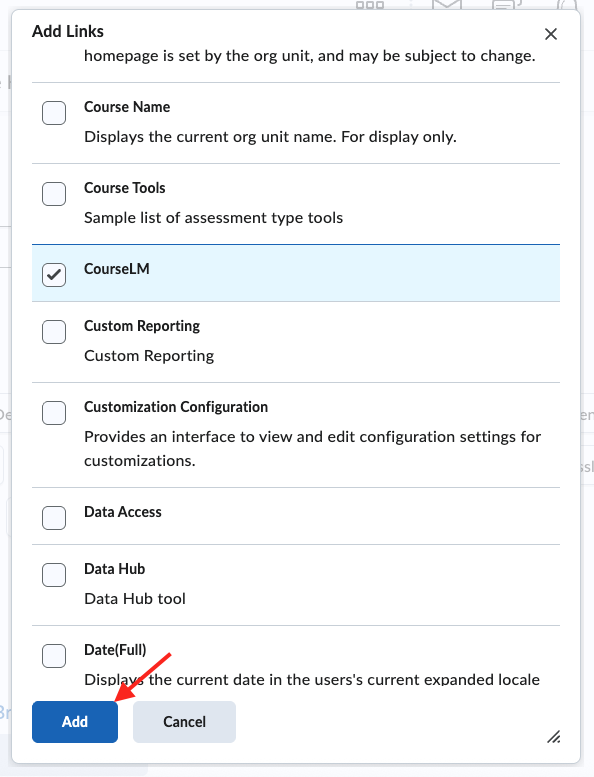
- Link: Click Insert Quicklink (chain link icon). Scroll down, select External Learning Tools, and choose CourseLM.
- Behavior: Same Window
- Click Create
- Drag the CourseLM chip to your preferred location in the navbar and click Save and Close
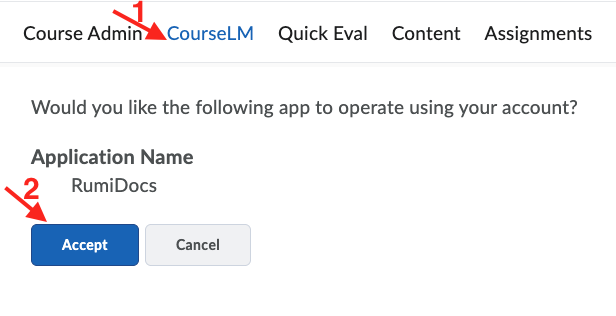
Note: You can now access CourseLM from the top navigation bar within any course. Upon your first visit, you will be prompted to authorize RumiDocs. This is a one-time setup.