Canvas Integration Guide for Admins
Key Points
- Approximate setup time is 10 minutes.
- Once Admin integrates Rumi in Canvas, all Instructors will have access to Rumi.
- To use Rumi in Canvas, classes and assignments must be created in Canvas, not Rumi.
- This is a single-sign on integration, you should not register new accounts on Rumi.
- Important: For steps 4 and 14, you may need to replace app.rumiessay.com with one of the following subdomains. Please contact support@rumidocs.com in advance to confirm which subdomains you should use. The available subdomains are:
- Schools in the east coast
- us-east-1.rumidocs.com
- us-east-2.rumidocs.com
- Schools in the west coast
- us-west-2.rumidocs.com
- app.rumiessay.com
- Schools in the east coast
Integration Steps
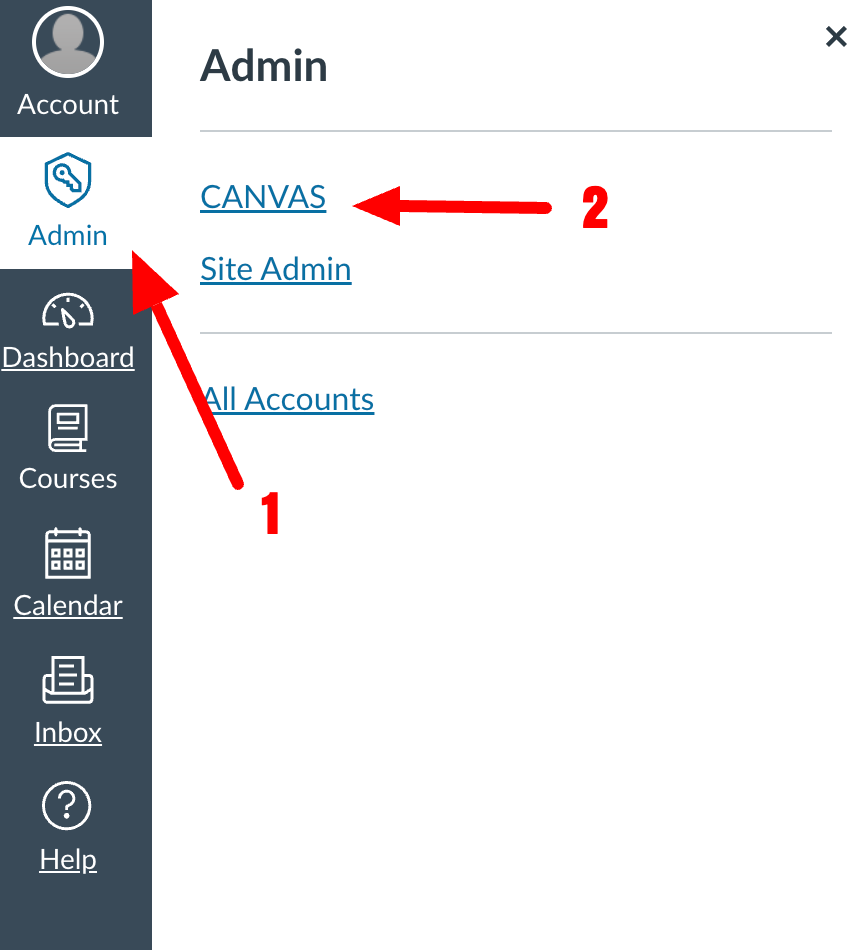
Step 1. Access Admin Panel
Open Canvas → Click on Admin → CANVAS.
Step 2. Navigate Developer Keys
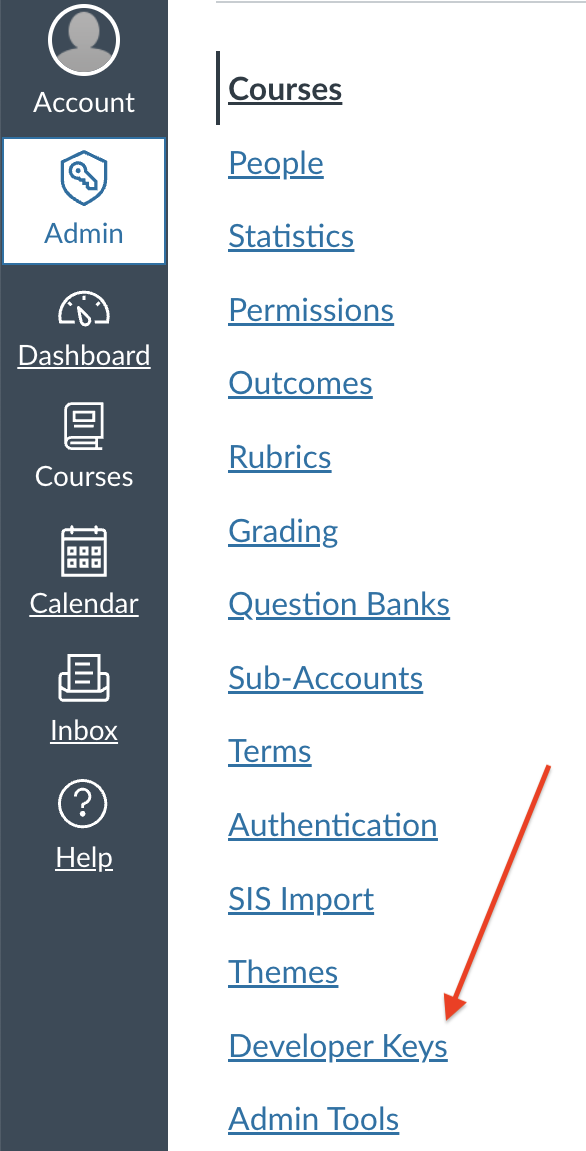
Scroll down and click on “Developer Keys”, then click on “+ Developer Key”.

Step 3. Create LTI Key
Click on “+ LTI Key”.

Step 4. Configure JSON Settings
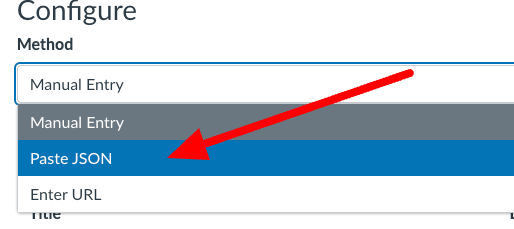
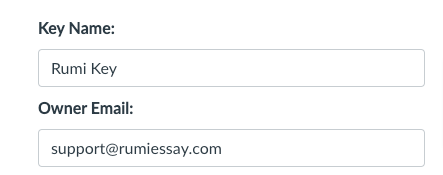
Click on “Paste JSON” then paste the JSON file from this link, and name the key "Rumi LTI Key" and add the following email address "support@rumidocs.com".
Step 5. Activate & Copy
After creation of the key, switch the "State" to "On". Then copy the "Client Id", this is needed for Step 9 and Step 11.
.png)
.png)
Step 6. Unlock app
In same page under Details click on "View in Canvas Apps"
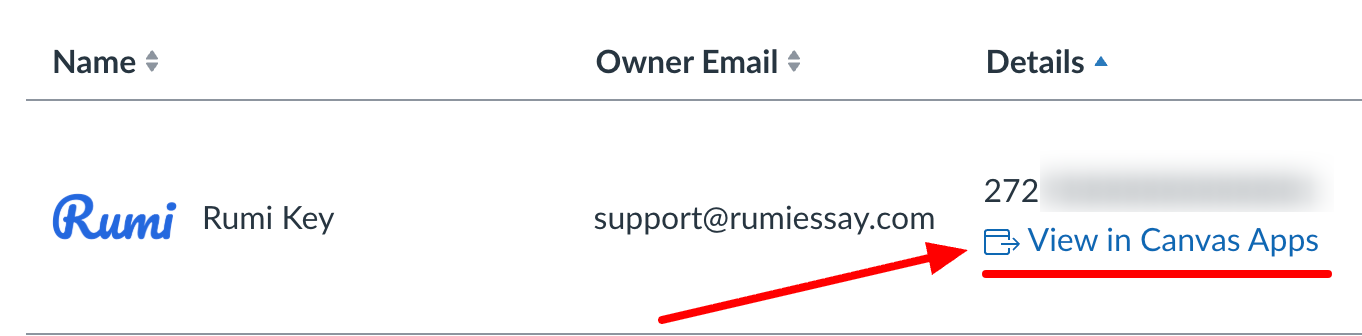
If app is locked, click on "Unlock App"
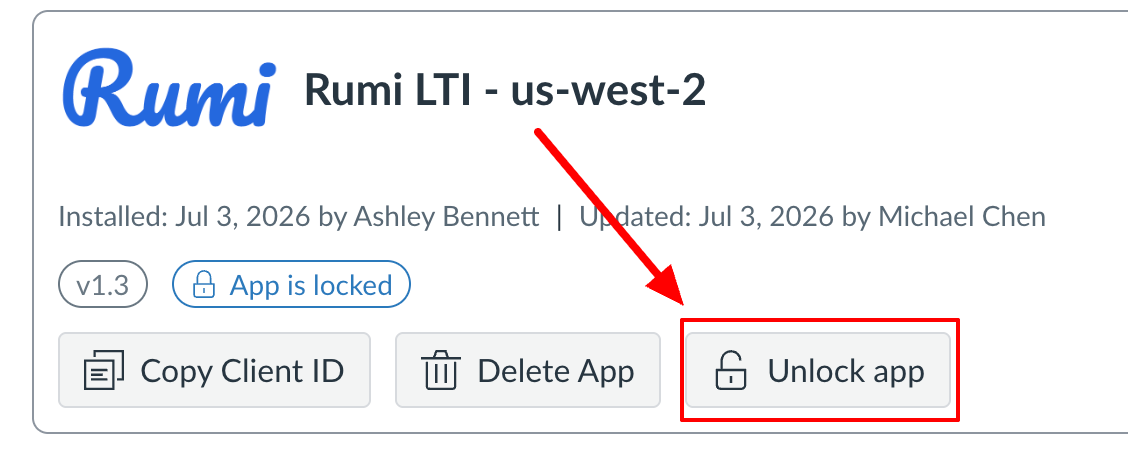
Step 7. Access App Settings
Click on Settings (left menu) → Then click on Apps (top menu).
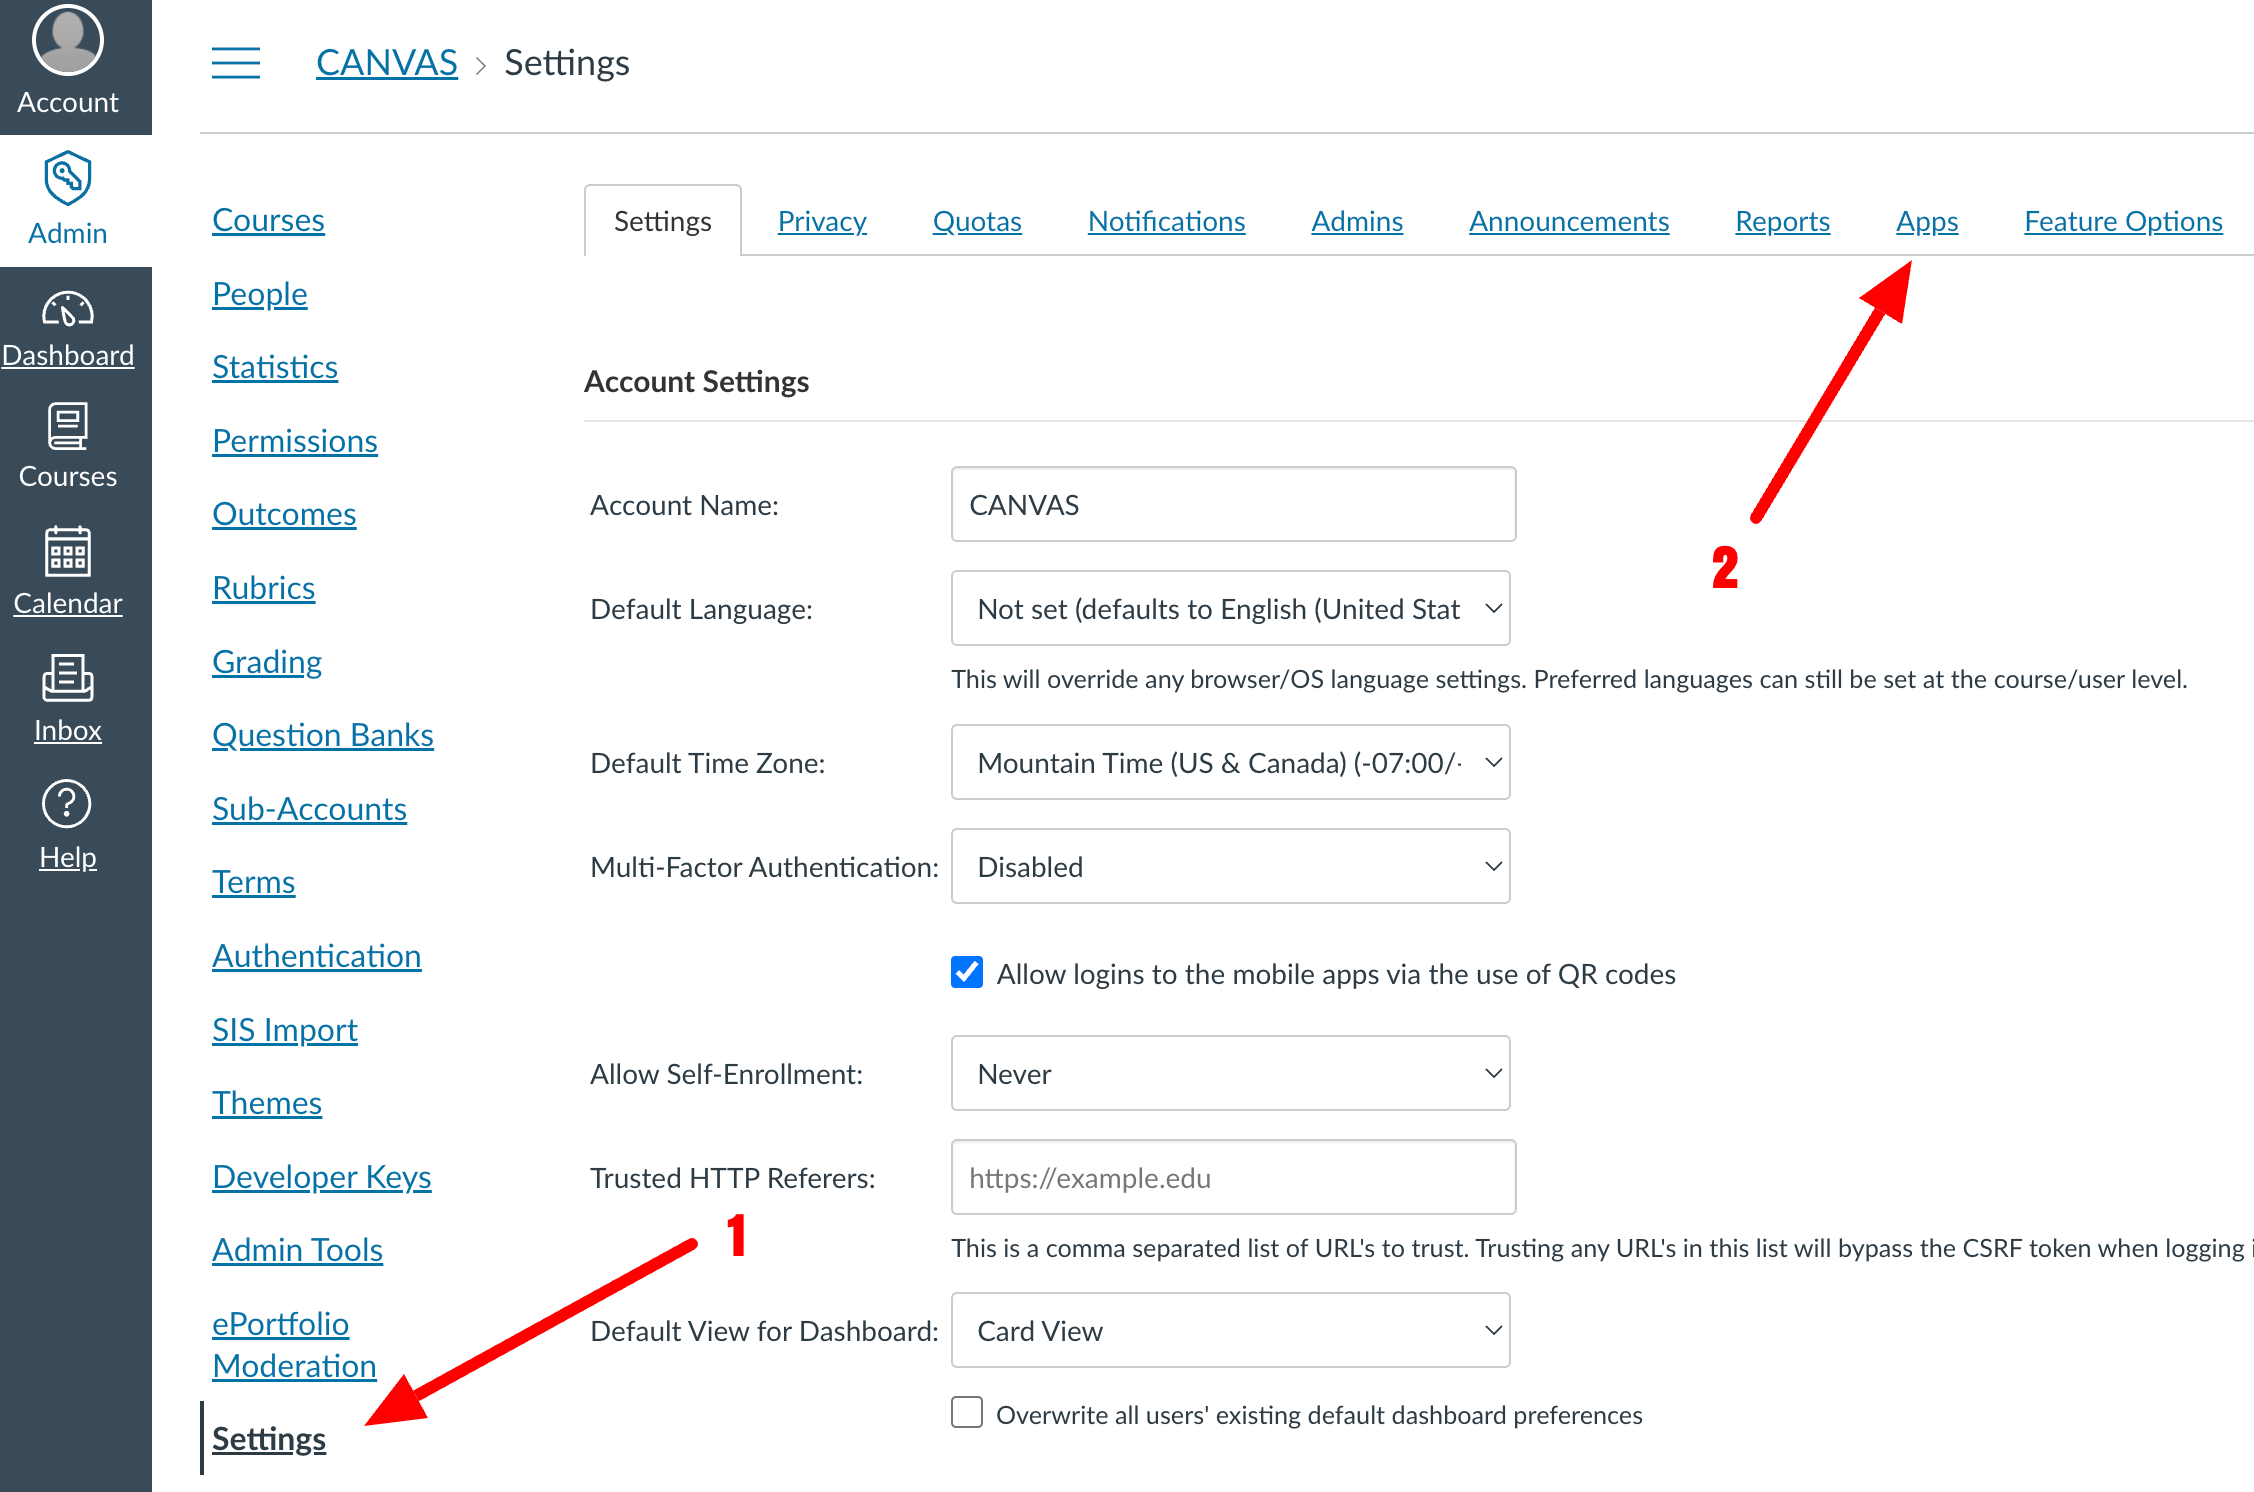
Step 8. Add New App
Click on “+ App” within Apps Tab. You may need to click on “View App Configurations” first.
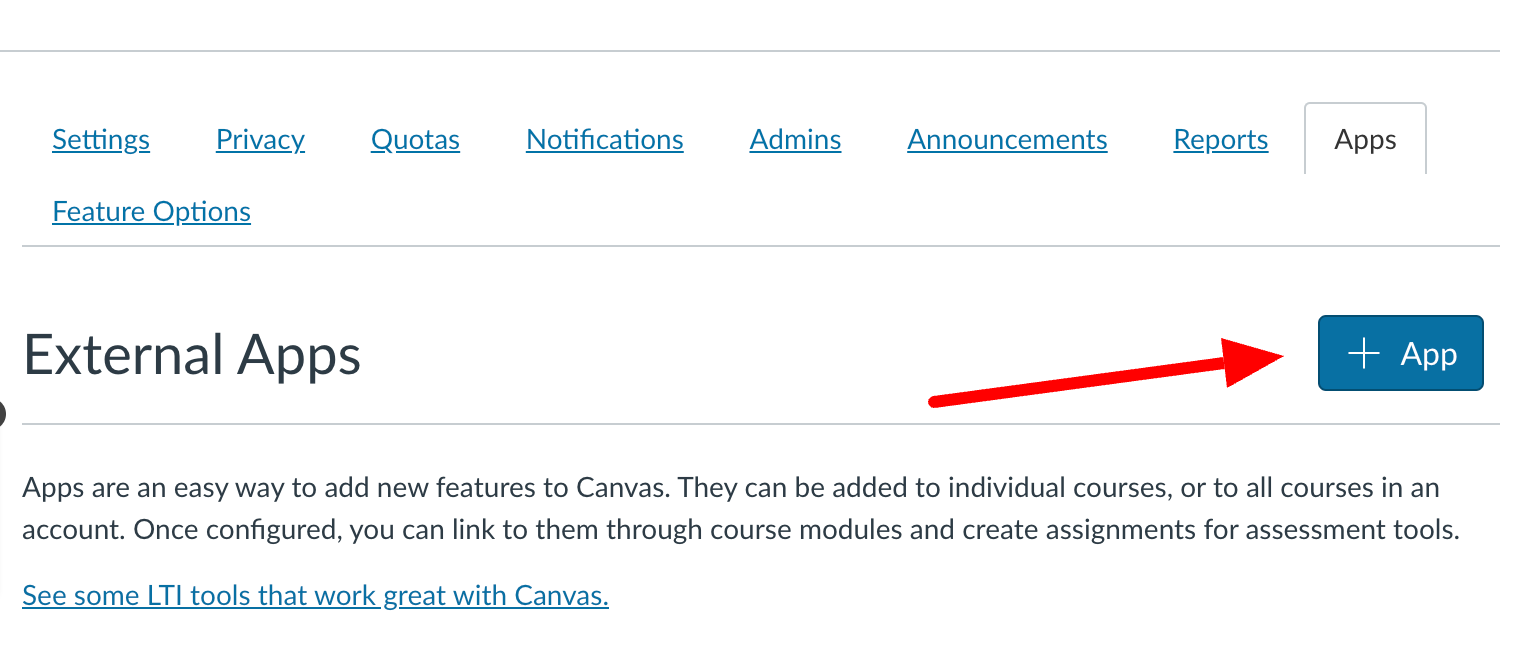
Step 9. Enter Client ID and Unlock
Choose by Client Id and paste the "Client ID" copied in Step 5.
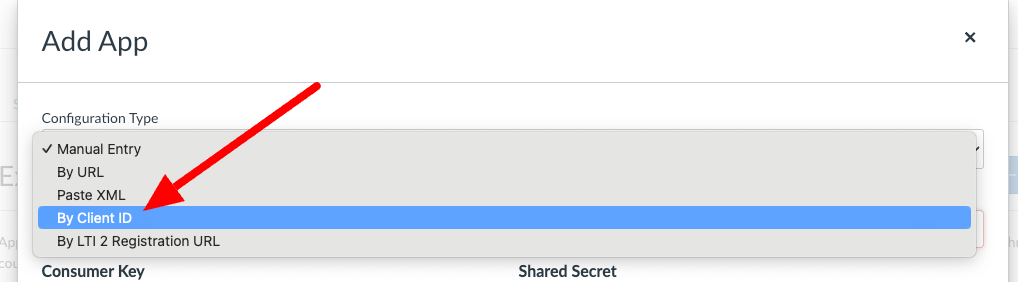
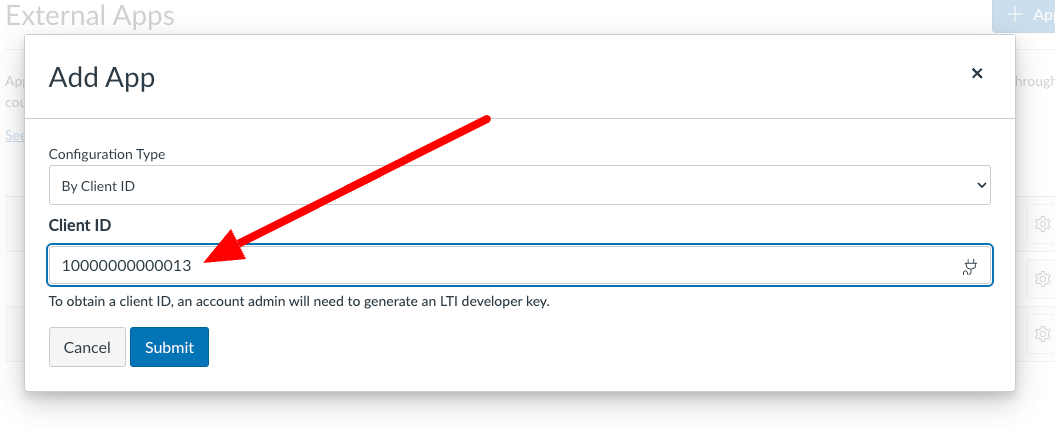
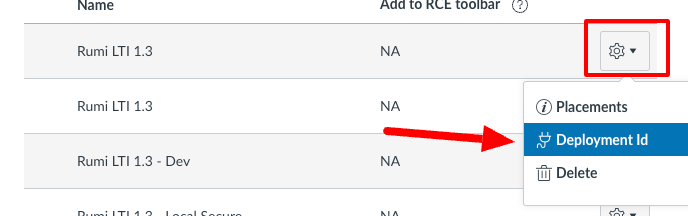
Step 10. Copy Deployment ID
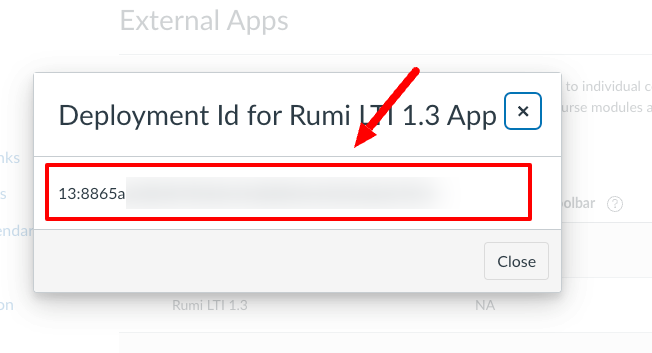
Then Click on the Settings button and click on "Deployment Id" and copy the Deployment Id, this is needed in Step 11.
Step 11. Record Configuration Details
Make note of the following details (or draft an email to support@rumidocs.com —but do not send it yet). You’ll need to email us this information and API key information in the final step (Step 17).
- Client Id in Step 5
- Deployment Id in Step 10
- Canvas URL of your institution
- Canvas Launch Environment e.g. prod, beta, test, etc.
Step 12. New Developer Key
Now click on “Developer Keys” again, then click on “+ Developer Key”.
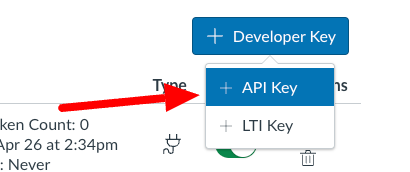
Step 13. Create API Key
This time, click on “+ API Key”.
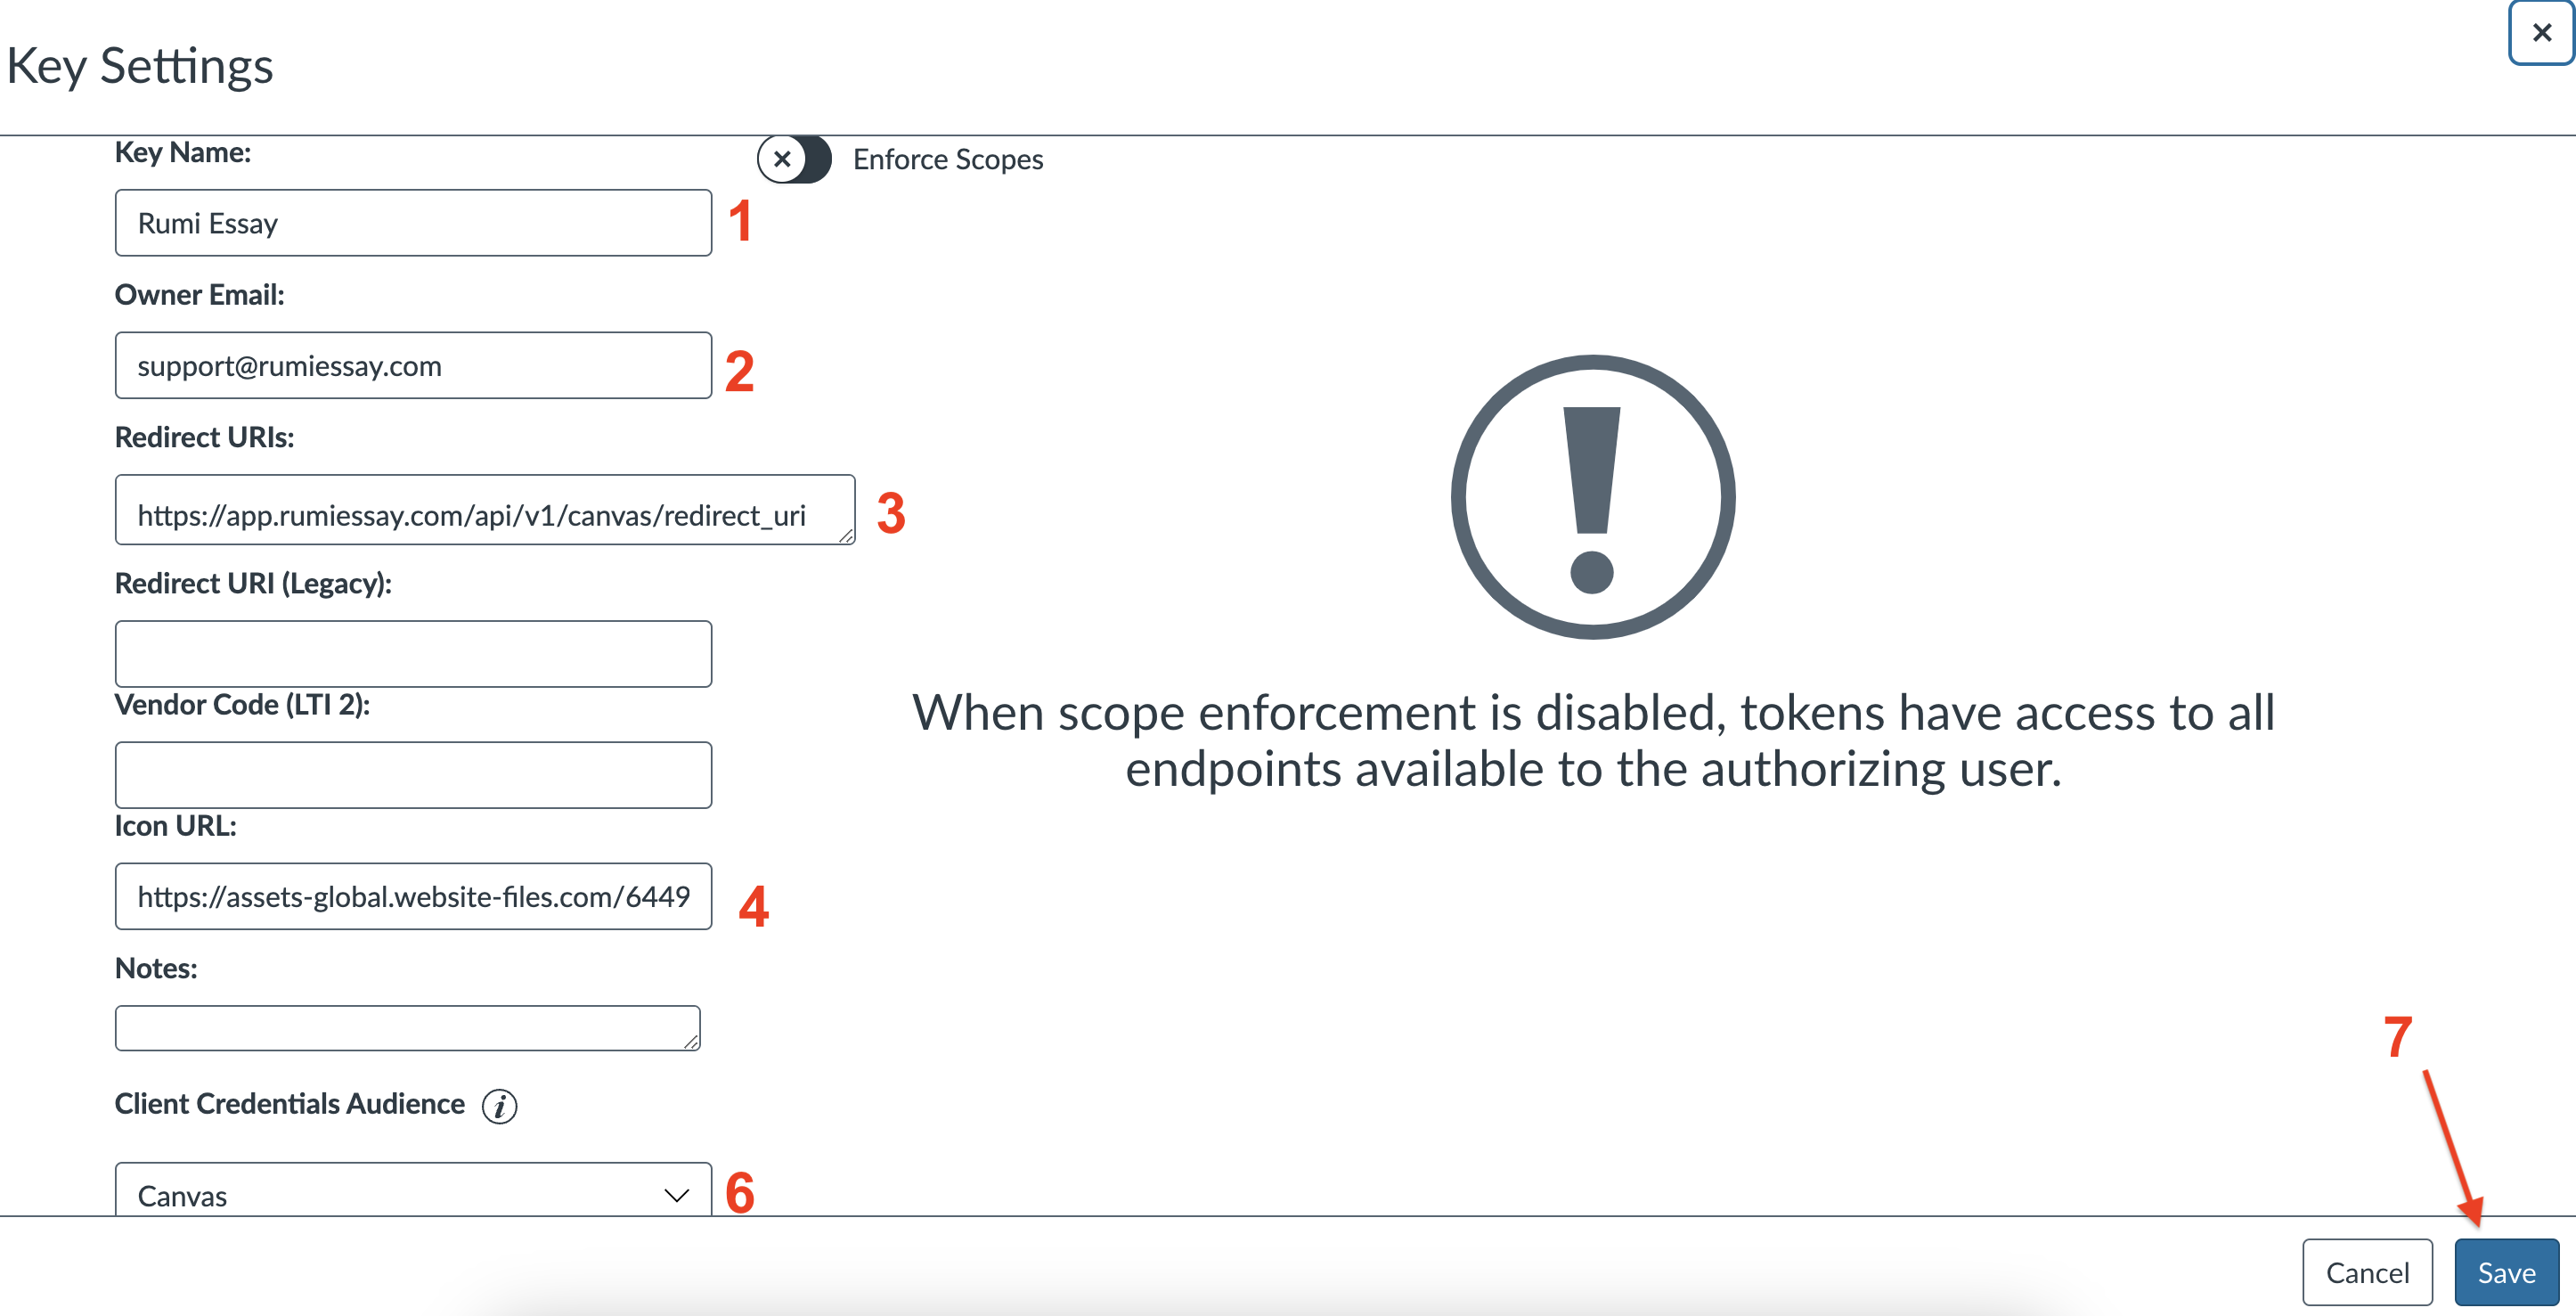
Step 14. Configure API Settings
Fill out the form using the following info then Click “Save”
Note: If you wish to "Enforce Scopes", you may use the scopes listed here. You must let us know that you have enforced these scopes for your integration.
Step 15. Store Shared Secret
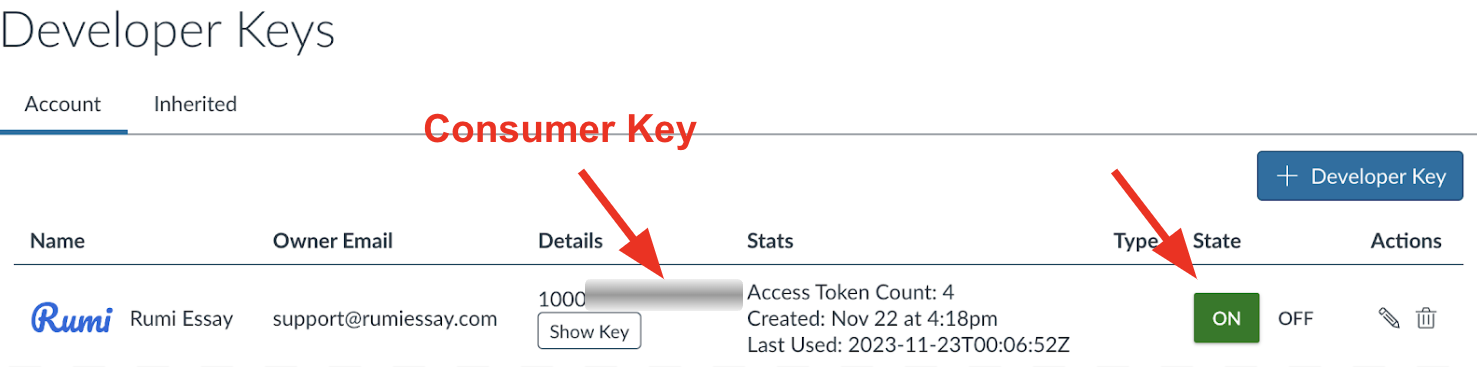
Click on “Show Key” and store the Shared Secret, it will be used in Step 17.

Step 16. Enable & Store API Key
Enable the key by clicking on “ON”.
Then, store the Consumer Key, it will be used in Step 17
Step 17. Email Rumi Support
Please send an email to support@rumidocs.com with the information below and LTI 1.3 data noted in Step 11:
- Generated Shared Secret in Step 15
- Consumer Key in Step 16
CourseLM Setup
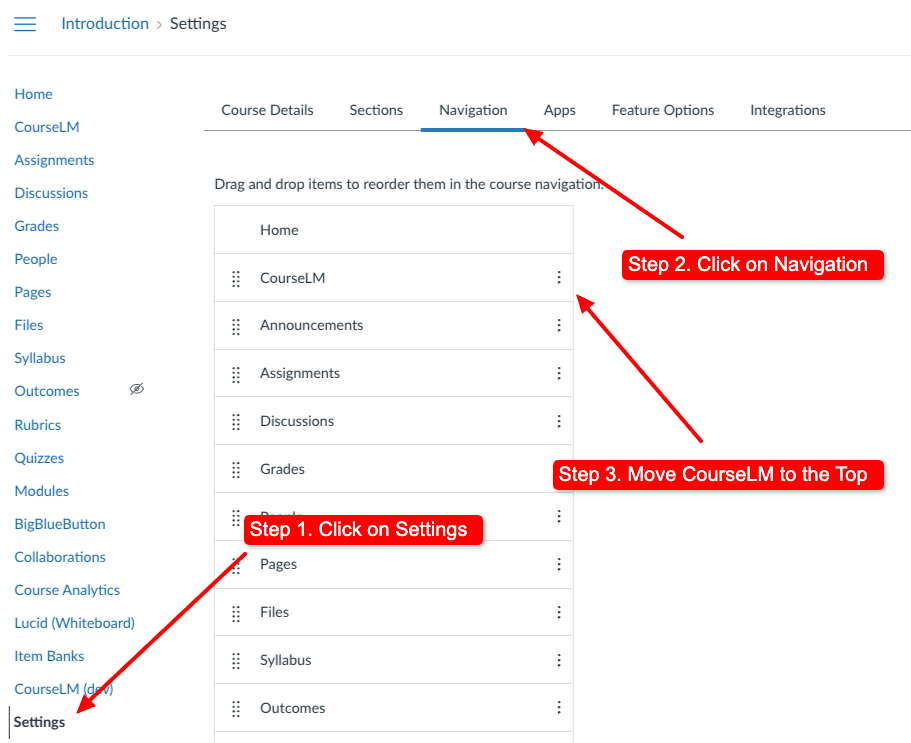
If you have CourseLM enabled, we highly recommend moving it directly under 'Home' in the left navigation menu. The screenshot below show the steps needed to achieve this.
- Click on a course and then click on Settings from the bottom left menu
- Click on Navigation from the top
- Move CourseLM to the top
Now follow the Guide for Instructor to add Rumi to an assignment